
|
principles projects CNMI-Guam old projects |
KnowHow /
Dist2faultSteps to locate a fault in a cable: 1. Press the “Mode” button, then select the “Stimulus/Response” mode from the menu that appears on the right of the screen. 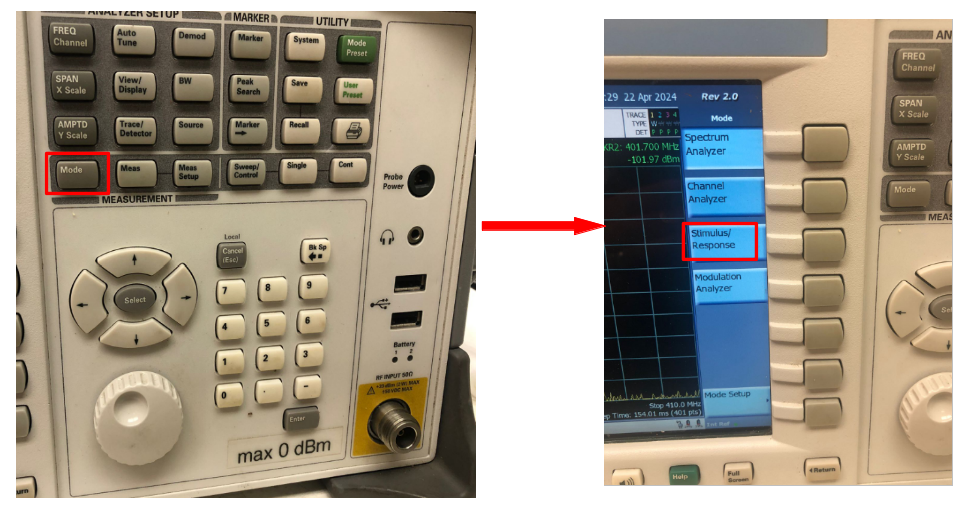 2. Press the “Meas” button and select the “Distance to Fault” function 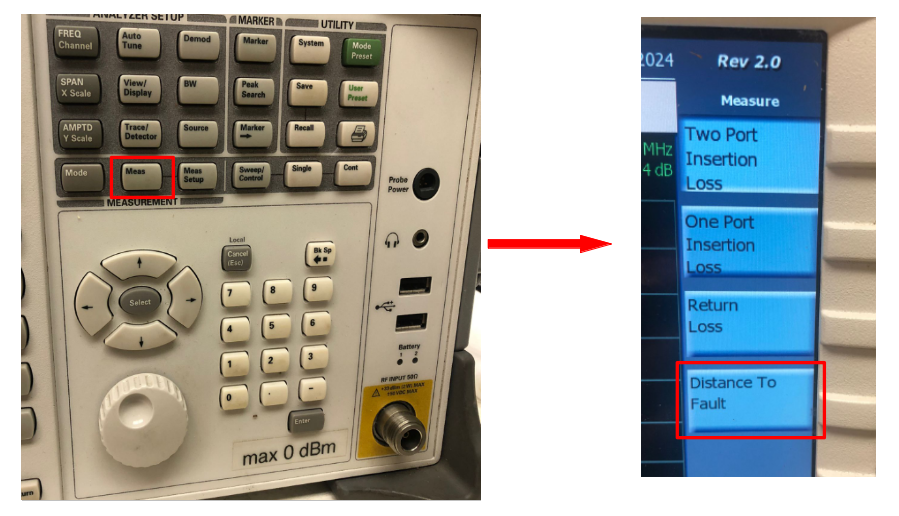 3. Press the “Meas Setup” button and then choose “cable type” then select the type of cable you are testing. In this example we have chosen RG-213. 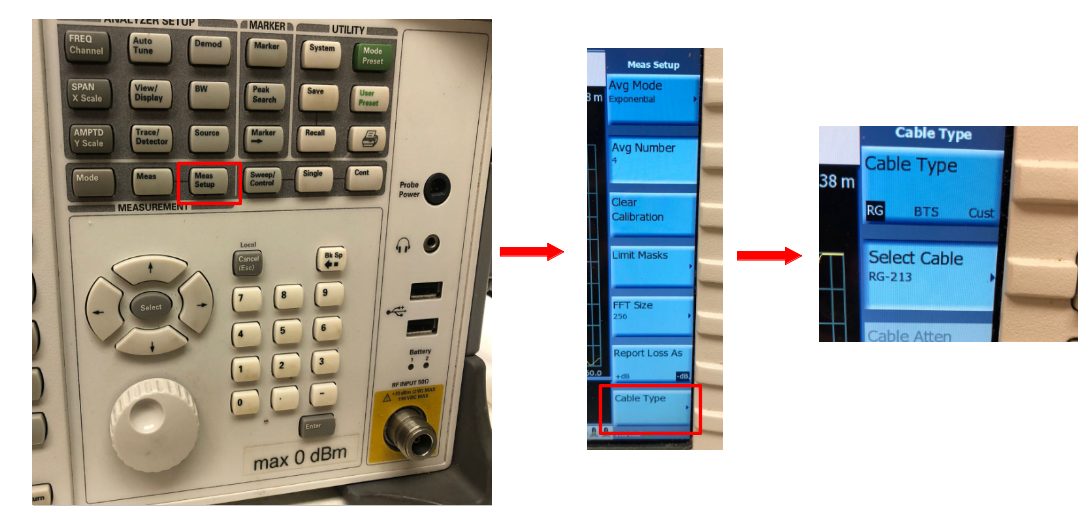 4. Press the “FREQ” button to display the “Freq/Dist/Cal” menu. Then select “Calibrate” from the list of options. 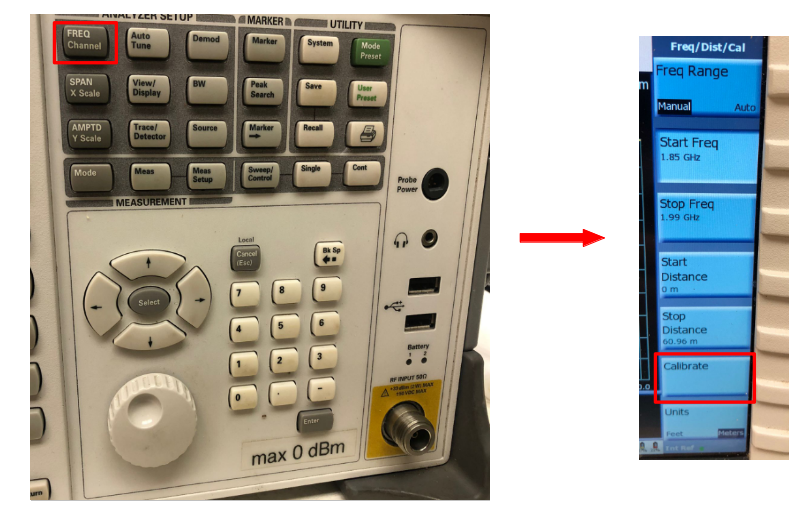 5. Following the instructions which appear on the instrument’s screen; 5a. Select the start and stop frequency, then press continue.  5b Connect the “Open adapter” provided with the machine, to the “RF output port” in the bottom left of the front of the instrument. Note that this adapter is also the “Short” adapter used in the next step of the calibration only in reversed direction. Press continue  5c Connect the “Short adapter” to the RF output port and press continue  5d Next connect the “909F terminator (Load)” to the RF output port and press continue  |